 |
GLUTEN FREE CHOCOLATE COOKIE HOUSE
Heat oven to 180 deg C
Place the butter, sugar and golden syrup in a medium saucepan and, on a low heat, stir with a wooden spoon until the sugar has dissolved, then remove from heat
Place the flour, xanthan gum, cocoa powder and bicarbonate of soda in a food mixer
Slowly add the melted butter mix to the flour mix and beat until well combined
Roll dough out to about 5mm thick on to baking paper
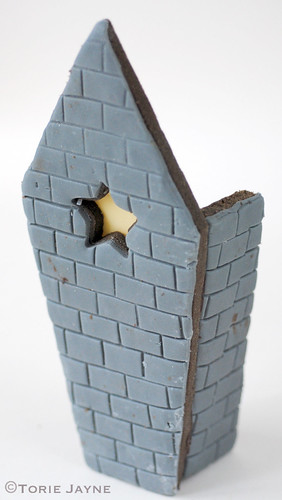
Cut out the pieces as template, remembering to mirror each piece that needs cutting twice, then cut stars out of fronts as marked on template
Slide cut pieces still on the baking paper on to baking trays
Bake in the oven for 8 minutes or until firm to the touch, turning the tray half way through cooking
Leave to cool for a few minutes, then re-cut around edges to neaten
Leave to completely cool
TO DECORATE
Dust icing sugar onto a hard clean surface and roll out coloured icing to 2mm thick
Press brick impression mat into icing
Using the 'haunted house' templates, cut out all side pieces in icing. Marking the star cut out on the front of the house pieces.
Brush water onto back of cut-out icing component and place on top of corresponding gingerbread piece. Repeat until all gingerbread house side pieces are iced
Melt dark chocolate in a bain marie or in the microwave on low heat
Brush melted chocolate around inside of star in front of house Push white chocolate star over hole, leave to set
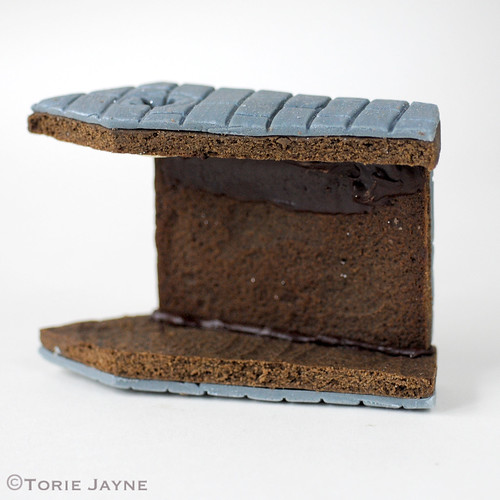
Paint melted dark chocolate on to inside of left house front edge piece. Push left house sides into chocolate, hold in place for a couple of minutes until chocolate sets, see photo
Paint melted dark chocolate on to inside of right house side piece. Push right house fronts into chocolate, hold in place for a couple of minutes until chocolate sets, see photo
Paint melted dark chocolate on to inside of main house back edge piece. Push main house sides into chocolate, hold in place for a couple of minutes until chocolate sets. Paint melted dark chocolate on to inside of main house front edge piece, lay on top of side pieces. see photo
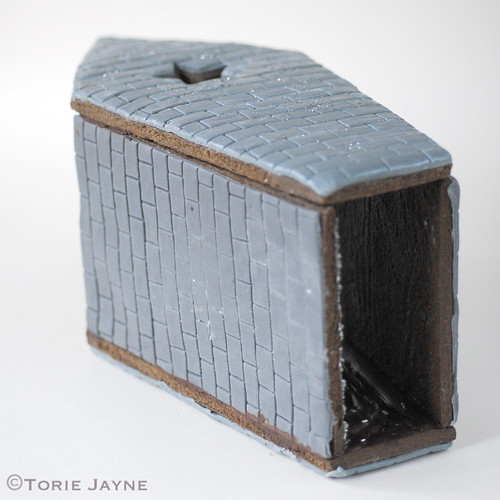
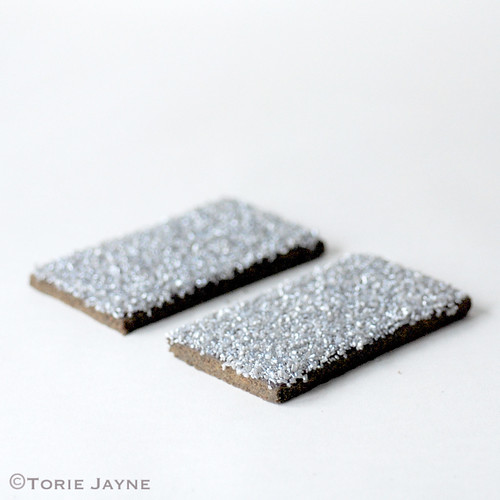
Assemble the roof house as above, attach to the main roof gingerbread piece, using melted chocolate. Leave to set. Using a spatula smooth dark chocolate onto front of one of the roof pieces Liberally sprinkle with silver sugar strands, leave to dry. See photo
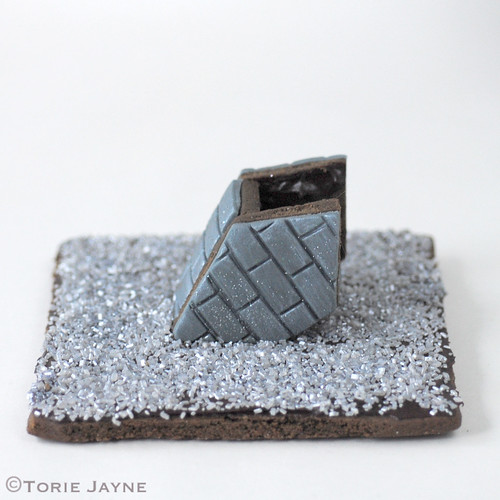
Paint melted dark chocolate on to base side edges of assembled main house pieces and attach to base. Leave to set.
Paint melted dark chocolate on to side and base edges of assembled left house pieces and attach to main house on base. Leave to set. Paint melted dark chocolate on to side and base edges of assembled right house pieces and attach to main house on base. Leave to set.
Using a spatula smooth dark chocolate onto front of one of the roof pieces Liberally sprinkle with silver sugar strands, leave to dry. Repeat until all roof pieces are covered in silver sugar strands
Using a sharp knife, angle the inside edge of the roof pieces so they are 45 degrees
Brush melted chocolate on to the top edges of the main house. Push main roof of house into chocolate hold in place for a minute or two until chocolate sets Repeat with all roof pieces
Brush melted chocolate on to top of roofs along the join. Stick small silver dragees into melted chocolate, leave to set
Brush melted chocolate on to the cookie base that is visible. Immediately sprinkle with black sugar crystals before chocolate sets.
Lightly dampen the iced houses with a small brush and apply lustre dust in silver and leave to dry. Brush edible silver glitter on to painted iced houses.
Melt a small amount of white chocolate. Dip M&M's in to white chocolate and stick round base of house.
Cut wire to length desired and apply to the back of the white chocolate stars with a little melted white chocolate, leave to set. Once set, dip ends of wire into melted chocolate and push in to the roof, holding the wire till the chocolate sets.
Add a white chocolate skull and fondant roses around the base of the houses.
|
 |
This set allows you to make 4 x 3D skull shapes at a time using a variety of edible mediums such as sugarpaste, candy melts, marzipan and more.
Measuring at 3cm wide and 4cm tall, the sugar skulls can be used as individual cupcake toppers or used as part of a spooky scene on Halloween themed cakes!
Rub a little white vegetable fat or cornstarch into the mould before use for easy removal of your sugar skulls.
Makes perfect 3D skull shaped cake decorations for Halloween.
Thank You Tori Jayne for sharing your wonderful ideas. |
You got to love Poundland!!!!!
Where else can you get a Halloween Village for under£10.00
TUTORIAL
Poundland now have their Christmas houses, trees and little ceramic figurines.
Get as many as you want to be part of your village.
The first thing you want to do is to spray paint everything in black.
The faces of the figurines are scary as they are so we put some play dough on top of them to protect them from the paint.

After, it was time to turn the village dark. Spray paint everything, the houses, the trees, the people.
Don’t worry about painting it perfectly. All there is left to do is to display the Village.
Make it look realistic, use boxes and candle holders to make different levels.
Add fake spider webs to give the effect of fog and lights to create shadows.
We even added some glue dots to the plastic bats we found also at Poundland{ They were bat rings, just cut the backs off of them}

Elegant Pumpkin
Artificial pumpkin
White or black acrylic paint
Paintbrush
Silver rhinestones
Plastic spider
Silver spray paint
Hot-glue gun and glue sticks
Paint the pumpkin with white or black paint, applying 2-3 coats.
Let paint dry between coats.
Let the pumpkin dry thoroughly, then hot-glue the rhinestones to the pumpkin in a spiderweb design (as shown).
Spray-paint the plastic spider silver; let dry. Hot-glue the spider to the side of the pumpkin.

Dark Chocolate Peppermint cupcakes
 |
| Elegant Halloween dinner Party table |
 |
| Halloween Jars |
Kids will have a great time poking spiders into fake webs and stuffing them in jars, eyeballs would be good tooGlue some extra spiders and add a little extra web to the outside of your jars for a fun spooky scene.


