Monday 29 December 2014

Favourite Brands & Shops A-H

  
I wanted to take my packaging & logo to a more professional level, after much research I found the perfect product AVERY. I purchased the Avery Printable Bag Toppers with Bags & Oval Labels which made it easy to create and customise my packaging adding my logo and product information.
This is their story

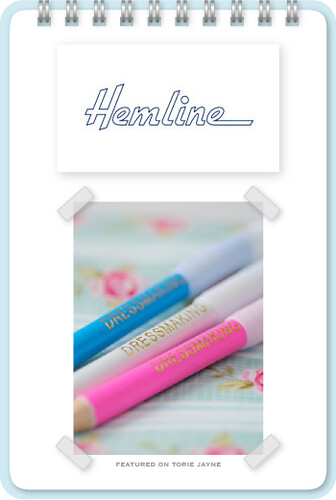
Hemline is an Australian brand who makes haberdashery supplies, they started in 1987 with a range of some 80 popular sewing necessities. Hemline is now one of the best-known and largest haberdashery ranges in the world today and the range now features over 1,000 sewing and craft items, produced in eight different languages and sold the world over.
I love their water soluble marker pens and pencils and the ever so cute polka dot scissors!


Sunday 21 December 2014

Book Review Evening..... Giftwrapped

Those who know me, understand my fetish for paper & fabric, my collection of both is vast, and whilst I love to hoard collect I hesitate to use it, but this has changed.
I stumbled on this book in the nick of time before I drowned in a sea of  paper, fabric & gifts to wrap. This little gem... may I call it a bible?
 About The Author
Jane Means is a professional gift wrapper to many high end clients, including British Royalty, Harrods, American Express and several high end couture fashion houses as well as various celebrities. Jane is known as Britain's gift wrapping expert and runs a gift wrapping school up and down the country, appearing on television and featuring in many glossy magazines and national newspapers.
She also designs her own ribbon collections and decorations, which are featured regularly in the press and are sold online and wholesale.

'Gift wrapped, Practical and inventive ideas for all occasions' is a beautiful hardback book that is both an inspirational visual feast and an expert master class for wrapping everything from a champagne bottle to awkward shapes
The book is split into five chapters, after an introduction it starts with "The Material World" where Jane share with you her vast knowledge about wrapping paper, flexible wrappings, ribbons and trims and embellishments. This is followed by lovely inspirational mood boards from pretty pastels to brights, Earthy tones to monochrome.
Chapter two, titled "The Art of Wrapping" is where Jane shows you how to wrap simple boxes, roof style boxes, add stylish pleats to your wrapping, wrap using two different styled papers and how to line a box with tissue paper to enhance our gifts. Jane follows this up by sharing how to wrap awkward shapes with ease and style from circular tins to bottles.
From there we go on to chapter three "The Art of Tying", where Jane shows us how to tie all kinds of bows from simple bows to crossover bows, corner bows to beautiful tailored bows and flamboyant bush bows. Also included in this section is some great inspirational labelling and tag ideas.
In chapter 4 "Special Occasions" Jane shares some beautiful wrapped gifts for Festive occasions, Gentlemen, ladies, children and wedding favours and gifts.
Chapter five, "Tools and Equipment" covers all you need to know about arming yourself with a basic tool kit so you can recreate all the projects in the book.
At a recommended retail price of £20.00, it is a great inspirational yet practical book that I think you will use time and time again so that your gifts are always beautifully presented in a
thoughtful manner.


 giftwrapped book by Jane Means


Thursday 18 December 2014

Gluten Free Mince Pies

Marzipan topped mince pies
 
Marzipan topped Mince pies


Ingredients

18 Gluten free mince pies

200g gluten free plain flour

1 tsp xantham gum

2 tbsp
icing sugar

75g almonds (ground)

1 pinch salt

125g butter

1 large eggs (lightly beaten with 1 tbsp water)

359g mincemeat filling

marzipan

1 tbsp
icing sugar (for dusting)


Method

Gluten free mince pies


Place all the dry ingredients in a large mixing bowl, add butter and use your hands to mix until the mixture resembles fine breadcrumbs. Or, use a food processor to save a bit of time!

Make a well in the centre of your dry ingredients and add the egg and water.

Combine mixture with a wooden spoon, then knead by hand to form a ball of dough.

Cover with cling film (saran wrap) and place in a refrigerator for at least an hour before continuing.

Roll out marzipan to 5mm thick

Cut out marzipan snowflakes and leave to one side. If you let your marzipan snowflakes dry for a while, they spread out less whilst cooking and you are left with a clearer looking snowflake


Preheat oven to 160-180 deg C (325-350 deg F)

Lightly grease a 12 hole cupcake tin with butter.

Roll out the pastry so it is about 2mm thick. The dough will hold together if well mixed and rolled between two sheets of baking paper.

Cut out circles using a round or fluted pastry cutter.

Now line the cupcake tray with pastry, and gently press into each hole.

Spoon a heaped teaspoon of mincemeat into each case.

Place snowflake marzipan on top and lightly press

Cook in pre-heated oven for 10-15 mins

Take out of tray and leave to cool slightly before placing mince pies on a baking rack to cool

Dust with icing sugar.


Marzipan topped mince pies


Tuesday 16 December 2014

Christmas Treats


Snowy Village Christmas cake recipe
 
 
The houses are made out of coloured roll-on icing using square and triangle cutters. The tree was made using star cutters.
Ingredients

Gluten free 20cm fruit cake
450g currants
200g sultanas
200g raisins
100g cherries (glace, chopped)
100g cut mixed peel
3 tbsp brandy
75g almonds (chopped)
350g gluten free plain flour
1 tsp cinnamon
1 tsp mixed spice
0.5 tsp salt
275g butter (unsalted, at room temperature)
225g brown sugar (soft)
5 medium eggs
1 lemons (grated zest)
1 oranges (grated zest)
3 tbsp brandy

Method


Gluten free 20cm fruit cake

Place all dried fruit and mixed peel in a bowl, pour in sherry and mix well. Cover with a clean cloth. Leave for 12 hours or overnight so fruit can absorb the sherry
Preheat oven to 150 deg C (300 deg F)
Grease and line tin with baking parchment
Wrap newspaper/brown paper around tin and secure with baker's twine
Beat butter and sugar with an electric mixer on high speed until the mixture turns a pale colour
Beat in eggs slowly on medium speed
Sieve flour, salt and spices into the mixture and mix slowly on low speed
Fold in soaked fruit, almonds, lemon & orange zest until well mixed
Pour mixture into tin, level with spatula
Place sheet of grease proof paper on top, and make sure to leave a small circle missing from centre
Bake for 3 hours and 15 minutes on middle shelf
Place cake on a wire rack to cool
When cake is completely cool, remove cake from tin
Pierce cake several times with skewer
Pour 3 tsp of brandy over the top of the cake (feeding)
Wrap in baking parchment
Wrap in foil or store in an airtight container
Feed at regular intervals over the next few weeks


To Decorate
ready to roll icing (white)
marzipan
apricot jam
royal icing

 The houses out of coloured roll-on icing using square and triangle cutters. The tree was made using star cutters


    Christmas cake close up
    Close up of decoration


     This cake is simple to bake and fun to decorate and its Gluten free.


    Thursday 11 December 2014

    Christmas Traditions Trees


    One of my favorite traditions at Christmas is taking my time to decorate our Christmas tree and is always accompanied by eating homemade mince pies and maybe a glass of mulled wine or hot chocolate with little floating marshmallows. This year is no exception after foraging for the tree with Mr D & Miss D  I will set aside Sunday evening to decorate my tree.Which got me thinking I should share all my Christmas Tree decorating tips I have learnt over the years, from how to hang lights to hanging ornaments. So here are my top tips:
    Norway and blue spruces are naturally symmetrical, but their branches have awkward growths that keep ornaments from hanging freely. Clean them up with a little judicious pruning. With the tree standing upright, study it from a distance to see which areas need pruning. Then, prune small growths that jut straight out from the top and bottom of the branches. The lighter sections depicted in our illustration are the ones you'd want to trim away.

    Prune the Tree

    How to Hang Tree Lights:
    You will need roughly 100 lights for every foot of the trees height.
    Match your Christmas fairy light wire to the colour of the tree.
    Turn your Christmas fairy lights on and keep them turned on whilst you decorate your tree.

    Visually split the tree into three triangles vertically and work on each triangle separately, starting at the base of the trunk start by wrapping each string of lights in and out of the branches up to the top and back down. Try to keep the wires as concealed as possible. This method ensures you get a lovely inner glow to your tree and not just an outer shell of light.

    Step back from your tree and squint your eyes, look for dark or overly bright patches, rearrange the lights to get an even light throughout.
    When you are happy with the placement of your lights, use florist wire to keep any unruly lights in place.


    Hanging ornaments:
    You will need roughly 20 ornaments per foot
    9ft of Garland
    Try sticking to a small colour palette for a cohesive look. Ideally this should relate to or compliment the decor in the room your tree sits in.
    Use a few overscaled ornaments for big impact.
    Before you start, arrange your decorations by size and colour.
    Start with the largest ornaments in one colour, hang them on tree so you get an even spread of colour. Continue by adding the medium decorations in the same colour finishing with the smaller decorations. Remember to place some slightly back into the tree, to give it a little depth. Repeat with each colour grouping so you get a lovely even tone of colour throughout the tree.

     Suspend ornaments from tinned copper wire instead of manufacturer-provided hooks, which can slip off branches, causing breakage. To make your own hangers, thread a 5-inch piece of wire through the ornament loop; twist the wire around itself several times to secure. To hang, wrap the other end of the wire around the branch until the ornament is secure.

    Make sure you keep stepping back to look at your work as you go.


    Here are  few of my favorite designs....
    traditional Scandinavian style, love it, pretty perfect tree with lots of white, pops of red and rustic touches xx  Scandi-style Christmas

    #Scandinavian #Christmas tree


    Love this festive bird and plaid themed Christmas tree eclecticallyvintage.com

    pretty in pink Christmas treeSmall raised Christmas tree


    Monday 1 December 2014

    New Wool makes everything better

    I noticed a nip in the air this morning, I will put money on the fact that  winter has  arrived and hope those pesky rain clouds have blown away.
     I don't hate Winter, in fact I find the next few months quite comforting.
    Wrapping up warm and cosy makes walking pleasurable, as the evening draws in, pulling down the blinds turning on the lamps and lighting candles, warming, pulling on the pj's, cosy and snuggling under a blanket..... snugly.
    @ Pink Milk: Good For The Soul
    My  new wool
    Winter is also a time  I love to sit with a milky hot chocolate a couple of cookies in a comfy chair and crotchet or knit, these are possibly my 2 favorite crafts of all, I do have a passion for wool  and love to learn new patterns.

    I am so very happy today look what the postman dropped off a new shipment of wool. All projects that I started over the weekend have been put on hold I have to work with this now!
    I am great at making the granny squares but lazy on the sewing in of the ends and the actual making up of the thing, now I have lots of squares of different sizes and patterns just begging to be made up, but the thrill of a new project and more wool is too appealing.
    The squares will eventually be made in to blankets (promise).

     I have been designing this new blanket for weeks, after much thought I decided on "Dolly Mixture" colours  a mixture of cashmere,baby merino, superwash & cotton all super soft.
    The squares will be a mixture of plain crotchet  & a flower square see the ones below and will have less tails to sew in .
    Flickr - Coco Rose1  Colour combination
    My new wooI 
    DROPS afghan pattern on Ravelry

    I always buy my wool from Wool Warehouse, they have a huge range of all the leading brands, they are competitively priced but the one thing that makes me happy is their postage is free when you spend £25.00 and swift delivery this is so helpful when your eager to start a new project.


    I will post 2 tutorials 1 for making the flower and one for making the square.

    Monday 24 November 2014

    Ginger Citrus Simmering Spices


    Ginger Citrus Simmering Spices

    Ginger Citrus Simmering Spices. It's easy to make and will make a great addition to your autumn winter recipes

    (Note: this is not a beverage...it's like potpourri and is only meant to be enjoyed as a way to scent your home.)

    These make the perfect gifts, great as hostess gifts or just something to surprise a friend.

    Ingredients

    Dried Orange Slices
    Ginger Root chunks
    Cinnamon Sticks
    Whole Cloves
    Whole Allspice

    You will also need your choice of Mason Jars and some raffia for the jar lid.

    You don't need any precise measurements for this recipe.

    It's really just about layering each of the ingredients until you get to the top.

    I always start with 3-4 orange slices, then add a few pieces of ginger root,

    then the cinnamon sticks, cloves and allspice.

    I also add either a hangtag to the back, or a sticker to the bottom with directions for simmering.

    They can be added to a simmering potpourri pot, or to an old pot on the hob

    Notice I don't add any fragrance oil to this recipe; it's all natural so it can't hurt the pan used for simmering.

    The ingredients just need to be covered with water and simmer on low--remembering to always

    check the water level! The smell is fabulous. Perfect for fall.

    Note: I don't always dry my own orange slices.


    Tuesday 18 November 2014

    Natural Home Aroma Homemade


    15 Genius DIY Ways to Make Your Home Smell Wonderful

    I Love to fill the air in my home with subtle scents of spices, herbs, and fruit. I've now got a simple routine going that keeps our house smelling pleasant without staleness or day-after garlic odour.
    Keeping the supply list simple i only use items available at the grocery store or in a garden for these scent recipes. I want this to be easy and inexpensive so that I can set up a sustainable routine of wonderful scents in my home. These recipes are simply guidelines and don't have to be followed exactly. In fact, I will change them based on what I have in my kitchen.


    How to Make Natural Yummy Room Scents

    citrus -- Citrus is sturdiest, longer-lasting, and gives these scent recipes freshness. Lemons and oranges are particularly fragrant and have the best staying power in these scented waters.
    herbs -- Any herb can be used for making a room scent, but the ones that are sturdier and on woody twigs hold up the best. 
    extracts -- A touch of vanilla or almond extract improves most room fragrance mixtures. Mint extract has a nice fresh scent. You can also use whole vanilla beans instead of vanilla extract; pricey but amazingly fragrant. Bergamot is warm an comforting. It is best to use essential oils they may be a little pricey but a few drops go a long way.
    spices -- You can use ground or whole sweet spices. The whole spices look prettier, if your scented water will be in a location where it will be seen. I have found that cinnamon sticks and whole cloves have the most scent staying power. Cinnamon sticks can be rinsed off and reused several times. They keep on giving.

    Four Natural Room Scent Recipes
    General procedure: Combine the ingredients in a 2 cup (pint) jar or container, or in a pan on the hob. Cover them with water and heat. I'll explain different heating options further down. Keep reading.
     Scent 1: Oranges, cinnamon & cloves (allspice and anise are optional). This is my favorite, both for it's wonderful aroma and for it's staying power. This scent carries into multiple rooms better, and it can be reheated to scent your rooms for several days.

     Scent 2: Lemon, rosemary, & vanilla, It has a lovely freshness to it.  

    Yummy Scent 3: Lime, thyme, mint & vanilla extract. This combination has such a fresh, pleasant scent.

    Yummy Scent 4: Orange, ginger (fresh or powdered), and almond extract. This is a sweet, delicious scent. 

    Make ahead and...
    ...store in the fridge. Uncooked jars of scented waters will keep in the fridge for 1 to 2 weeks, so you can make these ahead to have on hand. I recommend adding all of the ingredients, including the water, to the jars before refrigerating them. I've tried refrigerating the fruit/spice/herb combos in jars without the water, but they don't last as long that way.
    ...freeze them.  I've tried freezing them both with and without the water added, and both ways work fine. I haven't tested them in the freezer longer than 2 weeks, but I'm confident that they can be frozen for a month or longer. Make sure you use freezer-safe jars  (Not all jars are freezer-safe.)
    How to heat the scented mixtures
    I have just tried a variety of methods, and all of these work to varying degrees. Some of them provide a more powerful scent than others. Just like the air fresheners you buy, none of these will scent a whole house; but I'll show you some ways to set up individual scent sources in multiple rooms. Hopefully you already have what you need to try out one or more of these options.
    Hob method.
    This is by far the best way I've found to get the most powerful scent that will spread to more rooms the fastest. It's easy as can be. Simply combine the ingredients in a pot on the stove, bring them to a boil, and then lower the heat to a simmer. They will immediately begin to scent your kitchen and spread to other rooms. How far the scent spreads depends on the size and layout of your house. A simmering pot like this makes all four rooms on our first floor smell good. The only drawback of this method is that you have to keep a close eye on the water level. If the pan dries out, you'll be smelling burned citrus instead of sweet, fragrant citrus.  NOTE: For a stronger scent, simply double or triple the recipe in a larger pot on the stove.
    Uncovered Slow Cooker Method.
    This is my personal favorite. I used a slow cooker--the kind making stews & casseroles. The mixture never actually bubbles and visibly steams. I left it uncovered on my kitchen counter to slowly release scent throughout the day. It's subtle, but creates a pleasant smell in my kitchen and a hint of scent in surrounding rooms. When I'm home, I will keep my  slow cooker going. It's easy and uses very little electricity. When I fill mine in the morning, it won't dry out for an entire day. If you're concerned about accidentally letting it run dry,  I put a scented jar mixture in the MICROWAVE for 2 minutes to get it really hot before I add it to the slow cooker. That gives it a jump start on releasing the scent.  NOTE: For a stronger scent, simply double or triple the recipe in a larger, full-size slow cooker and set it on high.

    Fondue Pot Method.
    If you have a fondue pot, then you have a portable scent station. Set it up in any room you'd like to scent. if you have a small ceramic fondue pot  that uses a tea light for heat  this will only remain warm as long as the candle lasts--3-1/2 to 4 hours. Like the slow cooker, this is a low level of heat and releases a very subtle scent--enough for a small room. Get the scent mixture boiling hot before adding it to the fondue pot. It would be yummy to set this up in our hall when we have guests. It would smell yummy when you walk through our FRONT DOOR. And, it looks pretty
    Add more hot water as needed. As the water evaporates from any of these warming bowls o top it off with additional HOT water. It needs to be hot when it's added so that it doesn't cool down the temperature of the scented water.  Higher heat = more fragrance.
    Gift them! These make a fun, unique hostess gift. Take one along to a party as a gift for your host that can be simmered and enjoyed the next day.
    Re use each mixture 2-3 times. After these have been heated and simmered for awhile, the water becomes cloudy  and some of the ingredients lose their vibrant color. Although they don't look as pretty, they still smell good. Usually, you can reheat and simmer these again 2-3 times. Jar them up and refrigerate them between uses. Open the jar and give it the sniff test--if it still smells good, reheat and reuse it. Add more water as needed.

    Cost saving tips
    You can save, use and reuse a number of fragrant ingredients. These scents don't need to be expensive.
    Leftover ginger --  If you ever cook with fresh ginger and end up with leftover pieces , this is a way to use them up before they spoil. Slice the leftover ginger and freeze it in a bag or container to have on hand for whipping up a quick batch of scented water. 
    Save your orange peels -- When you eat an orange, save the peel for use in scented waters. Store them in the refrigerator or freezer until you need them.
    Save your juiced lemons and limes -- After you've juiced these for use in a recipe, refrigerate or freeze the leftover pieces.
    Save your leftover herbs -- If you have herbs in a garden or have leftover herbs that you've purchased for cooking, they can be frozen and saved for use in these scented waters.
    Use expired juices. If you have fruit juices that are past their prime, use them as a base in place of the water in these mixtures. They're both fragrant and colorful.
    Use expired spices. Spices are supposed to be replaced after a year, because they lose much of their flavor. But, they still smell good! Instead of throwing out old spices, use them for scenting water.There are endless combinations for these scented waters.
     If you have some additional ideas, please share. I'm always looking for a new, pleasant scent for my home.

    Winter Treats


    PinkPeonyPetal has been busy creating our indulgent "At Home Spa Treatments" tailored to suit, whether you wish to purchase as a gift or to treat yourself our products are pure and organic, all ingredients are clearly labelled. 

    Pretty gift baskets can be made in any combination.
    Prices start From £5.00 for Body Oils 8 oz
    Soaps range £2.00 -£3.00.
    Body Scrubs and Body Lotions start from £5.00 for 1/2 Litre
    Bath Bombs start £3.00

    Gift baskets prices on inquiry

    Postage extra shipping to UK only. 


    type=text


     Body Oils:
     Lavender, Cinnamon Spice, Refreshingly Minty, Sweet Orange and Yang Yang, Rose, Vanilla, Jasmine and Lemon, Patchouli and Lime,


      Homemade Soaps:

    Chocolate Milky Rosebar, Coffee and Cream, Apple Tart, Dead Sea mud, Vanilla and Almond, 
    Spicy Tea Glycerin,  Ginger Coconut Lime, Lollipop (great for children soap on a stick).    


    Warm Vanilla Sugar Coconut Body Scrub
    Warm Vanilla Brown Sugar Coconut Body Scrub 
    This brown sugar scrub smells absolutely amazing!
     Its definitely the perfect treat for skin that's begging to be pampered.
     Not only is it a wonderful exfoliant,
     but thanks to the coconut oil included in this recipe,
     its a perfect moisturiser.

    Ginger and Coconut Body Scrub
    Warm Vanilla Brown Sugar  Coconut Body Scrub This brown sugar scrub smells absolutely amazing! Its definitely the perfect treat for skin thats begging to be pampered. Not only is it a wonderful exfoliant, but thanks to the coconut oil included in this recipe, its very moisturizing to the skin as well.

    Body Scrubs
    Ocean, Lemon, Chocolate and Orange. Sweet Orange and Yang Yang, Ginger and Coconut, Coconut Lime, 


    Bath Bombs

    Bath Bombs: Rose and Geranium, Sweet Orange and Yang Yang,
     Peppermint. Lemon, Ginger, White Jasmine, Honey, Bergamot, Warm Vanilla


    Other products coming soon: Home Scents, Laundry  Cleaning Products, Face Cleansing, Shaving Products
    Contact me through Facebook, Email fdarbinson@gmail.com or through this Blog.

    Thank You 


    Monday 17 November 2014

    Clean Living


    Fresh Summery Scented Bedding Year Round

    Beat Those Stale Winter Blues With These Tips

    Winters are pretty cold & damp here in UK so windows tend to be kept shut and clotheslines hang empty for months, but there are a few tricks that help us enjoy fresh, fragrant bedding year round (with no nasty chemicals or expensive LAUNDRY PRODUCTS).
    Beat Those Stale Winter Blues With These Tips


    One of the things I miss most in winter is flinging open the bedroom window, stripping the bedding back and letting nature freshen up my bed linens naturally with sun and fresh air. But this list offers options that are just as easy and will provide a fragrance filled sleep year-round.


    Herbal Lavender Dryer Bags

    Try these easy to make dryer bags filled with lavender buds, they provide a natural moth repellent, SLEEP AID and a natural antibacterial.
    Herbal Lavender Bags:
    Fresh and fragrant laundry can be achieved chemical free with easy to make lavender bags. Using lavender buds gives the benefit of a natural moth repellent, SLEEP AID and a natural antibacterial.
    Use 1/4 cup vinegar in your rinse cycle (for static cling help, up the amount to 1/2 cup if needed) and toss the herbal sachets in the dryer for fresh smelling laundry. For optimal benefit, use organic lavender.

    Materials Needed:
    5″ x 5″ cotton muslin or cheesecloth squares (2)
    Thread
    Lavender
    Directions:
    Sew large “tea bags” out of the muslin or cheesecloth squares, leaving an opening at the top to fill with lavender. Sew the top shut. No need to sew fancy, just place the squares together and sew a single seam along the top about 1/4″ from the edge.
    Roughly squeeze the bags before tossing in with wet laundry. When items are done the scent is light, not overwhelming at all. Especially nice to use on loads of bedding (sweet, fragrant dreams).
    Bags are reusable! When the lavender is no longer doing its job, take a seam ripper and open about 2″ on one end, empty the bag, refill and sew shut. For one last kick at the can, crush the used lavender and toss it around your carpet. Let sit for about an hour then vacuum.
    Tip: Make more than one bag so that the same one isn’t in one load after another, alternate them so each bag has a chance to cool down before being used again.Easy Trick Using ESSENTIAL OILS
    Directions: Fill a small spray bottle with water then add several drops of ESSENTIAL OIL (lavender, mint, whatever you like). Shake then spray a clean white washcloth with the water/EO solution until lightly damp, toss in the dryer with the wet laundry. Scent will transfer to the bedding, lovely!

    Lavender Buds Vinegar Rinse


    Use this recipe for making a lavender vinegar suitable to use as a laundry rinse and fabric softener

     Lavender Vinegar Recipes

    Handful of Lavender FLOWERS and 1 Pint White Vinegar

    Directions:
    Combine lavender and vinegar, seal and let sit for 6 weeks before using. Strain. Use about 1/4 cup in the rinse cycle, increase up to 1 cup per load if stronger scent is desired.
    Scented Vinegar Rinse (ESSENTIAL OILS)
    Use this recipe for Fabric Softener Recipes & Dryer Sheet Tips
    Using 1/4 cup vinegar in your laundry’s rinse cycle keeps clothes soft. You can set aside a vinegar jug just for laundry and add about 2 dozen drops of your favorite essential oil to the vinegar if you’d like (or as much EO as you feel necessary).
    Scented Laundry Booster
    Directions:
    Fill a PLASTIC CONTAINER with baking soda then add a few drops of essential oil to preference (start with about 2 drops per cup). Stir well with a wooden stick or spoon (not one used for cooking). Seal the container and set aside for two weeks.
    After two weeks use it as a laundry booster (1/2 cup per load in the wash or rinse cycle–your choice). Do not add any commercial fabric softener.
    Homemade Scented Fabric Softener
    The fragrance is light once bedding has dried and you can increase the amount of ESSENTIAL OILS if it isn’t strong enough for you. Choose your favorite scents and add 1/2 to 1 cup of this mixture at the start of the rinse cycle:
    1 cup baking soda, 1 1/4 cups warm water, 8 cups white vinegar, Essential Oils of your choice.
    Tips & Tricks

    MATTRESS & Linen Freshener

    Using your blender, grind until fine 1/2 cup of dried herbs (try mint, lavender, lemon balm, etc.).
    Mix ground herbs with 1/2 cup baking soda.
    Sprinkle mixture lightly over MATTRESS PAD or cover then top with clean fitted sheet.
    Spread mixture more heavily on top half of bed where upper body rests to enjoy a consistent fragrance.
    Here’s another recipe you can try…

    Pixie Dust
    1/2 cup baking soda
    1/2 cup cornstarch
    1 1/2 tsp ground orange zest (dried)
    10 drops of your favorite ESSENTIAL OIL
    Blend all ingredients together in a blender then pour into a large shaker. Sprinkle on bed linens as needed.
    Scented Starch For Linens
    You can substitute the lavender EO in this recipe for any fragrance you like. 
    Dissolve 1 tablespoon cornstarch in 1 pint cold water. Add 6 drops of lavender ESSENTIAL OIL. Place in a spray bottle. Shake before using.
    Fresh pressed linens, nicely starched, and lavender scent wafting in the air. Nice!
    Homemade Linen Sprays
    Source: Hallmark Magazine

    Combine vodka (which is also a disinfectant), distilled water and fragrant oils to make these lovely linen sprays. Here are three easy to mix recipes

    Pour 2 TBS 100 proof vodka into a 16 or 32-ounce spray bottle then add the following:
    Jasmine Bergamot: 1 teaspoon jasmine oil and 1/2 teaspoon bergamot oil
    Lavender Sandalwood: 1 teaspoon lavender oil and 1/2 teaspoon sandalwood oil
    Vanilla Ginger: 1 teaspoon vanilla oil and 2 drops ginger oil
    Directions: Top the vodka and oils with distilled water, cap and shake to mix. Spray linens as needed, shaking bottle lightly before each use.

    Sweet Dreams Pillow Spray
    2 cups distilled water
    6 drops lavender ESSENTIAL OIL
    2 drops chamomile EO
    2 drops orange EO
    2 drops ylang ylang
    Directions: 
    Shake before using, spray on pillows and allow to dry before resting your head.  

    Linen Closet Sachets
    Directions: Mix 50/50 dried lavender and lemon balm and fill cotton fabric or cheesecloth sachets. Tuck sachets into CLEAN folded linens. These will scent the linens while being stored and can be used repeatedly. Lavender and lemon balm together is a very calming and relaxing mix, perfect for bed linens.


    When scenting your bed linens, it’s tempting to overdo it since you’re likely choosing your favorite fragrances. However, a light application is preferable since headaches and stuffiness may occur if fragrances are too strong (you’ll be sleeping on the linens for hours at a time). Strong smells may also keep you awake rather than ease you into a peaceful sleep.
    What To Use
    Choose scents that are pleasing to you and help you relax rather than those that perk you up. Your sleep will be more peaceful and less restless. This is especially helpful for those suffering from insomnia or who have regular trouble falling asleep. Some suggestions:
    Lavender
    Lemon Balm
    Lilac
    Rose Petals
    Peppermint
    Peaceful Sleep Mixes
    Lavender is commonly recommended as a home remedy for sleep since it’s thought to be effective in inducing a calm and peaceful rest. It’s also suggested as an excellent repellent for dust mites (see bottom of page), so it’s a great choice for linens. Most of the mixes I have collected include lavender…
    Lavender, Lemon Balm
    Lavender, Rose Petals
    Lavender, Rose Petals, Thyme, Rosemary
    Lavender, Rose Petals, Jasmine
    Lavender, Peppermint
    Lavender, Lilac
    Rose Petals, Lemon Balm, Chamomile
    When using dried herbs and flowers to fill sachets and sleep pillows or scent bedding, choose those that are pesticide free for best results. Here are several sachet patterns  .

    Dust Mites

    If you have perpetual stuffiness or the sniffles when you wake up each morning–it may be a slight allergy or reaction to the dust mites living in your pillows and mattress.
    Here is a collection of home remedies and tips to try combating these mighty creatures…
    Make lavender sachets to place underneath mattresses as well as tuck inside pillows
    Try using buckwheat pillows (instructions at bottom of page), apparently dust mites don’t live in them.
    If your bed linens can take it, Hot Water Removes Allergens Best (140°F/60°C or higher)
    Launder pillows too if they can be washed without damage (even down pillows)
    On hot sunny days, lay out or line hang pillows and heavy quilts outside to soak in the sun.
    Regularly pull back the bedding to allow mattresses to air out.
    Regularly vacuum the mattress as thoroughly and deeply as you can.

    Dust mites thrive in the environment provided by beds, kitchens and homes in general, where the sun’s rays do not reach them. Mites remain in mattresses, carpets, furniture and bedding, since they can climb lower down through the fabric to avoid sun, vacuum cleaners, and other hazards, and climb higher up to the surface if necessary to get another skin cell to feed on, when humidity is high. Even in dry climates, dust mites survive and reproduce easily in bedding (especially in pillows) because of the humidity generated by the human body during several hours of breathing and perspiring.
    Nasty little critters. But the thing to note is they don’t actually crawl all over you and feast on your body while you’re sleeping. They just live very close to you (and off your sloughed skin cells). It’s their feces and cast skins that pile up and make us sick.
    Dust mites feed on organic matter such as shed human skin. In nature, they are killed by micro-predators and by exposure to direct sun rays. Dust mites in bedding derive moisture from human breathing, perspiration, and saliva.
    The dust mite’s partially digested food, and fecal matter, is one of the most significant sources of allergens contributing to allergic asthma, rhinitis, conjunctivitis, and dermatitis.

    Mite Management Tips:

    *Steam cleaners may be effective at reducing enzyme allergens since the heat of the steam breaks down the compound. The application of frequent vacuuming as a dust control measure may aggravate allergic asthmatic conditions because conventional vacuum cleaners blow some dust through the cleaner’s bag into the air. Vacuuming helps remove the residue, as does washing, however, vacuuming does not generally kill mites because they cling to the surface. Dust collection by conventional vacuums results in a significant increase in air borne concentrations. Cleaners that send dust into a “liquid medium” such as water (rather than a dust bag) best accomplish vacuuming.

    * Enclose mattresses, box springs, and pillows in zippered allergen- and dust-proof covers.

    * Wash bedding materials, including pillowcases, sheets, blankets, and mattress pads every other week in hot water (130 °F).

    * Eliminate or reduce fabric wall hangings such as tapestries or pennants.

    * Purchase stuffed toys that are machine washable.

    * Avoid using curtains, drapes, or blinds on windows. Use plastic shades instead.

    * Remove carpeting from the bedroom of the allergic person and replace it with tile or wooden floors.

    * Replace upholstered furniture with wooden or plastic furniture.

    * Vacuum often with a vacuum cleaner provided with a high efficiency purifying air (HEPA) filtration system. Throw away vacuum bags after use because dust mites can leave the bag.


    My Love of White Linens

    My Love of White Linens and Towels - Ask Anna


    Going green means we're trying to avoid harmful chemicals in our everyday CLEANING SUPPLIES. That pretty much nixes bleach altogether, but here are a few natural ways to whiten laundry without the use of bleach...


    • If you spill something dark, pour salt on it to absorb moisture from the spill.
    • Apply white vinegar or lemon juice directly to stains.
    • Soak whites in a solution of water and lemon juice.
    • Wash whites with washing soda, similar to baking soda but with a lower pH.
    • After washing, hang whites to dry in the sun. Sunlight naturally bleaches without setting stains the way a dryer does.


    Friday 14 November 2014

    Clean Living


    Several years ago, as I was spraying some household cleaner on my kitchen counter tops, it occurred to me as I inhaled the strong fumes that they were probably settling in my water glass that sat nearby! And did I really want all this toxic residue on the surfaces on which my children ate, leaned, and played? Having read a bit about the effectiveness of good old vinegar as a cleaning agent and disinfectant, I dug out a spray bottle and poured some in. I never turned back!

    When I saw the idea to steep the vinegar in orange peels, I marveled at how that could be a simple, clever, and inexpensive way to turn ordinary vinegar into a boutique-type cleaner (which could probably fetch ten times it’s value!). But would the orange essence or the vinegar smell dominate? Mind you, the vinegar smell never bothered me, but I do love that fresh, sweet smell of an orange being peeled!

    After two weeks of steeping in the vinegar, the essence of the orange peels did, in fact, permeate the liquid and the result was a sweet smelling success! While I used the following amounts, you could choose any size jar with a tight-fitting lid, stuff it with peels, and fill with vinegar. Although it would require more fruit, lemons, limes, and clementines would be excellent options!


    Orange Vinegar:
    1 16-ounce canning jar
    2 oranges, peels only (eat the insides!)
    vinegar to cover 

    Curl the peels around the inside of the jar. I used two large oranges and would not have been able to fit another peel. If your oranges are small and you could fit another peel, feel free to add one more. Pour vinegar into the jar to cover the peels and close tightly. Store in the cupboard for two weeks, then transfer the vinegar to a spray bottle and use for all your CLEANING purposes!

    Note: I like to dilute the vinegar with 50% water for general CLEANING

    Origami Cards

    here are 4 designs from my Origami card collection 

    Christmas Dress

    Kimonos

    Here is a step by step tutorial for making an evening dress

    DIY Fashion Thank You Card DIY Fashion Thank You Card


    Tuesday 4 November 2014

    Purple Haze

    This cup is pure decadence

    Beautiful purple swirl pattern glass unknown supplier

    Carolyne Roehm beautiful floral arrangements

    An exquisite lilac linen dress with matching hat... for Silkstone Barbie. (Easter Morning Custom Fashion by Matisse.)

    I love the wallpaper and the sofa, it just makes such a statement for any room
    I love this lilac damask wallpaper and the sofa, it just makes such a statement for any room
    Fenton Art Glass Perfume Bottle Collectable | eBay
    Fenton Art Glass Perfume Bottle Collectable

    High Society - Victoria colorway for Anthology (image from Hawthorne fabrics)