Saturday 21 February 2015

Pretty Packaging


Hand Stamped Rose Gift Wrap | stamp a simple rose with a piece of celery!

 
Use a small bunch of celery to create this delicate rosebud print.
TIP
Place an old towel underneath the brown paper before you start. Working on a soft surface will make the rosebud prints more prominent.

You Will Need
  • roll of brown paper
  • craft paint
  • stencil foam brush
  • small bunch of celery
1 Cut off the celery stalks near the root, using a sharp knife.
TIP Use masking tape or an elastic band to tie the individual stalks into a neat bunch.

Ceate your own giftwrap_1

2 Group the stems together firmly and blot the ends on a sheet of paper towel to get rid of any excess moisture
Ceate your own giftwrap_2
3 Dab your stencil foam brush in some craft paint and apply it to the ends of the celery stalks.
Ceate your own giftwrap_3
4 Press celery roses onto the brown paper. Reapply the paint as needed and keep going to cover the entire sheet of brown paper with flowers.
Ceate your own giftwrap_4


gift wrap - to work on -  pink spring, ribbon roses, notepad doilies  -  http://la-couronne.de
 
Gift wrapped for a friend the box is covered in pink paper. the little flowers on the top are made from pretty wired ribbon, behind them pale pink silk gerbera flowers.
 
gift wrap - easy - yellow spring with burlap, organza bow, special rosette, bird / DIY tutorial  -  http://la-couronne.de/
 
 a rectangular box is neatly packed in gift paper.
Materials I used
- Box
- Wide jute tape - orange
- Narrow satin ribbon - orange
- Ruffled Trim - Orange
- Henkel an earlier tote bag - yellow
- Wide organza ribbon - orange
- Rest wide satin ribbon - yellow (in the bag)
- Spring - yellow
- Skeleton leaves - Orange
- Small metal birds (Sprinkles
 
♥ ᘺrapped ᘺith ʆove ♥
 
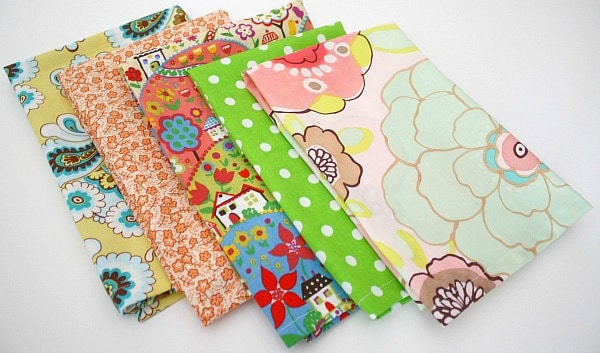
Simplicity is often the key..... pretty paper, ribbon, lace, crotchet flower
DIY Bubble Printing
Bubble painting
 
tin can packaging
Dress it up, dress it down it's tin can packaging


Pretty Sprinkles

Custom Coloured Sprinkles


Colored sprinkles_11

Today, I am going to show you a quick and easy way to make your own custom-coloured sprinkles.

Colored sprinkles_15
 
In case you didn't know, I am crazy for sprinkles.  I actually collect them from all over the world and even have an entire cabinet in my kitchen devoted to them.  Seriously.  :-)  But, one of my major pet peeves is that it is extremely difficult to find sprinkles in pretty colours.  I find that the selection - even at professional baking supply stores - is very limited.  So, I decided to take matters into my own hands and make my own.  It's a super easy process and I promise you, that before you know it, you'll be making sprinkles in every colour of the rainbow.

Here's what you'll need to get started:
* white sprinkles (jimmies) or non-pareils
* powdered food colouring or petal dust
* small plastic bags
* toothpicks
* glass jars for storage

I bought my sprinkles by the pound from amazon.  This is a very economical way to buy them - especially since you will find that you will want to make lots and lots of pretty colours.

Colored sprinkles_4
 
To begin, place some sprinkles in a small ziploc bag and, using a toothpick, add a very small amount of your powdered food colouring or petal dust.

Colored sprinkles_1
 
Keep in mind that a little of this stuff goes a long way.

Colored sprinkles_2
 
 
You can always add more, but you don't need very much to get a pretty amazing effect.  For very pale tints, add just a little.  For brighter shades, add more.  Close up you bag and shake it gently - evenly distributing the colour.  In just a few seconds, you will have beautiful coloured sprinkles!
 
Colored sprinkles_5


I went a little crazy and made a ton of colours...
 
Colored sprinkles_13
 
 
I like to store mine in glass spice jars.
 
Colored sprinkles_9
 
And the wonderful thing about making your own custom-coloured sprinkles is that you can use them to coordinate with the specific colours of your party or wedding.  Need Hydrangea Blue, but can't find it at the store?  Just make it yourself!

You can even make your own "rainbow" mix...


Colored sprinkles_14


You really have to try this - it's so much fun and the results are fantastic!

Fav places in London

We founded Primrose Bakery in October 2004 having started out baking for children's parties, but quickly noticed how well the cupcakes went down with adults! We also couldn't understand why things you could find in America, France and Australia were much harder to find in England.
Now ten years on we have two shops - one in Primrose Hill and one in Covent Garden, plus four cookbooks and an App. At times we can't believe that something we started at home has grown so much. It gives us a huge sense of satisfaction to see people queuing out into the street on a Saturday afternoon, waiting to buy our cakes - there is no better feeling than this, to see that people really do want to buy and eat what we have made.
We have tried to keep it to simple old fashioned cooking, using good quality, seasonal and well sourced ingredients, as one might use at home when baking for your own children, friends and family.
We hope you enjoy our cakes!

This bakery is the best you must visit at least once

Primrose Bakery. London. by sofia
Primrose Bakery


primrose bakery by DaisyCombridge


The Red Teapot is a well-known antiquarian store at Portobello Road in West London. Underneath its sign of a hanging pot, you can find several antique dealers, who feature a wide range of antiques. These include distinguished stores as Linda Gumb Textiles Decorative Objects & Jewellery, Sandy Stanley Antiques, Heather Bond Victorian Dolls, and many more. Over here, you can find decorative antiques, furniture, vintage jewellery, metalwork, collectable antique dolls, rare porcelains, tapestries and cushions

File:3644649892 2d46eb03a9 b.jpg


Covent garden & Neil's Yard

Hidden down an alley behind Covent Garden, Neal’s Yard is a unique and colorful shopping area lined with ‘slow food’ and ‘raw-centric’ cafes and unique independent shops. Hot pink, bright purple, and neon green painted storefronts include Slam City Skates for the skateboard enthusiast, the Hair by Fairy beauty salon, and the popular Neal’s Yard Remedies filled with organic beauty products, homeopathic medicines, and its own in-house therapy rooms. Neal’s Yard owes its name to Thomas Neale, who received a piece of land in 1690 from King William III, however, the area did not become a destination until the mid 1970s when entrepreneur Nicholas Saunders put Neal’s Yard on the map when he opened his Whole Food Warehouse in 1976. Saunders gradually bought up other buildings in the alley and helped to finance a co-operative bakery, dairy, flour mill, apothecary and cafe. He planted trees in tubs, filled window boxes with flowers and imported white doves that fluttered overhead. Today, Neal’s Yard has become a popular gathering place filled with office workers, tourists and regulars who gather in its colorful courtyard.

A bad day in London is still better than a good day anywhere else.  London, Covent Garden & The Stand, Neal’s Yard


Cowshed Spa Tucked away from the hustle and bustle of Carnaby Street is the Cowshed Spa. This chain is part of the Soho House group, and it shows in the interiors — think mood lighting and the world's most comfortable sofas. Stepping through the doors of the salon, one breathes a sigh of relief as the stresses of the fashion calendar fade away. Plus, there is free Wi-Fi, so you can still catch up on emails with relative ease. Cowshed Spa, 31 Fouberts Place, London, W1F 7QG.


Cowshed Spa Tucked away from the hustle and bustle of Carnaby Street is the Cowshed Spa. This chain is part of the Soho House group, and it shows in the interiors — think mood lighting and the world's most comfortable sofas. Stepping through the doors of the salon, one breathes a sigh of relief as the stresses of the fashion calendar fade away. Plus, there is free Wi-Fi, so you can still catch up on emails with relative ease. Cowshed Spa, 31 Fouberts Place, London, W1F 7QG.
 

Madeleines Frozen Birthday Cake


This is Madeleine's Frozen birthday cake.
The bottom layer is a 10inch chocolate sponge with chocolate ganache filling, the top layer was a 7inch vanilla sponge with chocolate ganache filling.
Both cakes were covered in fondant and buttercream. I made blue & white snowflakes sprinkled with edible glitter. I made rock candy
 

  • 2 cups water
  • 1 cup white corn syrup
  • 3 1/2 cups sugar
  • 1/4 tsp cream of tartar
  • 1/4 tsp vanilla extract
  • 3 drops of blue gel food colouring
  • I boiled the mixture and then continued stirring it on the heat until it reached 300 degrees F (used a candy thermometer to measure the temp). At that point, I poured it into a tray to cool. It hardened up in about an hour and then I smashed it to pieces.


    The figures were from the Disney Store and of course non edible.

    Easter ideas

    Add a bit of sparkle to painted eggs

    I found these  candles  they make an excellent table decoration

    Pretty felt birds ideal addition to an Easter basket
    simple to make

    Patrón o plantilla con forma de pájaro para broches o adornos de fieltro
    print out this template re size if needed
    Use pretty pastel felt for bodies embroider running stitch around bird
    stuff with soft stuffing.
    Use scrap for wings attach to body with a couple of stitches
    through a button.
    Add stick & bow


    easter hues


                                                              Happy spring everyone!


    .
    These are so pretty I would love one


    Tasty creamy lollies


    Chocolate pastels
    Pastel chocolate flat back cabochons


    Totally inspired by Peggy Porschen, these cute cupcakes were so much fun to make! I've discovered how nicely rounded the fondant tops get when I mould them in my half sphere pan first, until semi dried. The fondant cups can then be stored in an airtight container for days. Just don't stack them on top of each other like I did the first time!
    Under the fondant there are regular vanilla cupcakes with vanilla buttercream. Gum paste daisies made with a plunger cutter.


    Eggs
    Pretty dyed eggs
    Natural dyed eggs

    All-Natural Easter Egg Dye Recipes

    Use these all-natural dye recipes made from household ingredients to create Easter eggs in beautifully subdued shades. Leave eggs soaking in the dye in the refrigerator overnight for the richest colours.
    Bluish-Grey
    Mix 1
    cup frozen blueberries with 1 cup water, bring to room temperature, and remove blueberries.
    Blue
    Cut 1/4 head of red cabbage into chunks and add to 4 cups boiling water. Stir in 2 Tbsp. vinegar. Let cool to room temperature and remove cabbage with a slotted spoon.

    Jade Green
    Peel the skin from 6 red onions and simmer in 2 cups water for 15 minutes; strain. Add 3 tsp. white vinegar.

    Faint Green-Yellow
    Peel the skin from 6 yellow apples. Simmer in 1-1/2 cups water for 20 minutes; strain. Add 2 tsp. white vinegar. Simmer 4 oz. chopped fennel tops in 1-1/2 cups of water for 20 minutes; strain. Add 2 tsp. white vinegar.

    Orange
    Take the skin of 6 yellow onions and simmer in 2 cups water for 15 minutes; strain. Add 3 tsp. white vinegar.

    Faint Red-Orange
    Stir 2 Tbsp. paprika into 1 cup boiling water; add 2 tsp. white vinegar.

    Yellow
    Rich yellow: Simmer 4 oz. chopped carrot tops in 1-1/2 cups water for 15 minutes; strain. Add 2 tsp. white vinegar.
    Mustard-yellow: Stir 2 Tbsp. turmeric into 1 cup boiling water; add 2 tsp. white vinegar.
    Various shades: Steep 4 bags of chamomile or green tea in 1 cup boiling water for 5 minutes.
    Pale yellow: Chop 4 oz. goldenrod and simmer in 2 cups water for 20 minutes; strain. Add 2 tsp. white vinegar.
    Faint yellow: Simmer the peels of 6 oranges in 1-1/2 cups water for 20 minutes; strain. Add 2 tsp. vinegar.

    Brown-Gold
    Simmer 2 Tbsp. dill seed in 1 cup water for 15 minutes; strain. Add 2 tsp. white vinegar.

    Brown
    Add 1 tablespoon vinegar to 1 cup strong coffee.

    Pink
    Faint pink: Chop 4 oz. amaranth flowers and simmer in 2 cups water; strain. Add 2 tsp. white vinegar. Simmer the skins from 6 avocados in 1-1/2 cup water for 20 minutes; strain. Add 2 tsp. white vinegar. Mix 1 cup pickled beet juice and 1 tablespoon vinegar.
    Dark pink: Cut 1 medium beet into chunks and add to 4 cups boiling water. Stir in 2 Tbsp. vinegar and let cool to room temperature; remove beets.

    Lavender
    Mix 1 cup grape juice and 1 tablespoon vinegar


    Pastel Valentines Day Party Cupcake Display
    Pretty buttercream cupcakes
    

    Wednesday 11 February 2015

    Living & dining room treats


    Nearly finished.....

    I think these two rooms deserve a couple of spring treats.
    This year I am thinking of changing some lampshades & making new cushion covers.
    For the dining room maybe some pretty napkins & napkin rings, all my dinnerware is white and so is the tablecloth I use for dinners (I have a pretty one for afternoon tea) a pop of colour will do the trick.


    If you would like to make 8 napkins ONLY you will need:
     1/2-yard of Echino Solid in Bright Pink
    1/2-yard of Echino Solid in Chartreuse
     1/2-yard of Kona Cotton in Bright Pink
     1/2-yard of Kona Cotton in Mustard
    Embroidery Thread in Light Brown Black
     A small embroidery needle
     fabric marker such as tailor’s chalk or a pencil

    Finished Measurements
    Napkins:  16-inches square
    Placemats:  13-inches x 17-inches

    Cutting


    Cut one 18-inch square from a solid fabric.
    Use tailor’s chalk or a pencil to mark a line 1-inch in from all four edges as pictured above.

    Hemming Step 1


    Press two opposite edges in 1/2-inch to meet the drawn line.


    Fold these folds over 1/2-inch once more, encasing the raw edges.
    Press and pin the folded edges into place.


    Beginning 1-inch from the corner, at the intersecting drawn line, sew the two folds into place with a small running stitch approximately 1/8-inch from the fold. Stop at the opposite intersecting drawn line, 1-inch from the raw edge.


    Your stitches should be neat and relatively straight along the fold.

    Hemming Step 2

    Fold all four corners in a right triangle shape as pictured above, press into place.


    Press the two remaining raw edges in towards the drawn lines like you did for the first step of the hemming. Make sure to keep your corner triangles pressed down as you do this.


    Fold the edges over again 1/2-inch, press and pin into place.


    Starting from the inside of the mitered corners sew these folds into place with a small running stitch approximately 1/8-inch from the edge of the fold. (The miter of the corner is a great place to hide your knot!)


    This pattern is found @ Purlbee.
    Napkin Rings
    I am going to make these in pretty pastel shades (sorted)

    Back-to-School Craft: Make Cloth Napkins for Your Child's Lunch Box
    this fabric will make some little napkins


    pretty napkin rings
    I can't decide... I like these and they will be simple to make


    Cushions Only got a scrap of the fabric you love....use a different fabric on the back.  A co-ordinating colour / pattern looks brilliant but even a liing or canvas will do.
    If you only have a scrap of fabric you love....
    use a different one on the back.


    Cushions I like and I love

    I love  the trim


    To make all of my DIY Envelope Pillows for spring I used:

    -5+ yards of fabric
    -11 pillow forms
    – rotary cutter and cutting mat (if you don’t have this you can use fabric scissors)
    – sewing machine, thread, fabric scissors
    – iron and ironing board


    I started by measuring my pillow forms and cutting my fabric to fit each form. I mainly used 18×18 square pillow forms (I like the ones from IKEA the best) but I also made a couple of lumbar style pillows in a 12×18 size as well as a 14×25 size. For the purposes of discussing measuring during this tutorial I will refer to the 18×18 size forms.
    You are going to need to cut your fabric to the correct width (18″) and length doubled plus 8″-10″ – So: 18″+18″+8″ = 44″-46″ total for the overlap on the back.

    How to judge what size to cut your fabric:
    I only added about 1/2″ for seam allowance on my 18″ width because I like my pillow covers to fit the pillow forms nice and snugly – no saggy loose pillow covers for me. You need to be the judge of how much seam allowance you need to add because it depends how full and firm your pillow form is. If you have a super full form then maybe add 1″ for seam allowance. If your pillow form looks like horses recently trampled on it, then squish it together to get the accurate size for a nice plump pillow when you measure it.

    When it is time to cut, measure twice (or 3 or 4 time) and cut once!
    I’ve screwed up cutting before. It is truly heart wrenching to waste beautiful fabric. I might not be lying if I told you it has brought me to tears.
    Think it out first and be careful. If you don’t have a rotary cutter and mat (probably my favourite crafting tool ever) then you can use a long straight edge and pencil to mark a line and regular ol’ fabric scissors to cut your fabric instead.
    Simple Stunning DIY Envelope Pillow Tutorial cutting fabric at The Happy Housie
    Once cut, give ‘er a little iron to smooth out those wrinkles. At the same time you can fold over and iron the hem on the edges that will make the envelope fold on the back (by this I mean hem the short 18″ ends that are at each edge of the looooooong doubled+8-10″ piece). I used the salvage edge of the fabric for one end – it will be folded inside the pillow so you won’t even see it. Then I only had to hem one end. Score.

    Simple Stunning DIY Envelope Pillow Tutorial iron edge at The Happy Housie

    Now measure your piece of fabric and fold it in onto itself, with the ‘right’ or good side facing in. If, like me, you used the salvaged edge then make sure you fold down the nicely hemmed edge first and have the salvaged edge on the outside of your folded pillow cover (so that when you flip it inside out the salvaged edge will be on the inside of the envelope flap where you won’t see it).
    I always like to iron my edges to set them at the correct size before sewing.
    Now you just sew together the two edges of your form
    Flip it inside out
    And stuff it! Literally

    Re covering a lampshade

    First- Lay out your drum shades seam in line with the end of your fabric:

    Second: Start drawing a line on the top and bottom of the drum, leaving 1 1/2 in. between the drum and the line.
    Third: Roll your drum across the fabric until you have completed a full circle and your back at the seam. Make sure you have your line {1 1/2 in. away} outlining the drum. This is what your fabric will look like once cut out:
     
       
    Fourth:Once cut out, wrap around the drum to make sure it fits properly
     
       
    ignore my excess fabric here, it was on purpose because I have a serious habit of cutting fabric too short
     
    Fifth: Start by glueing the fabric at the seam on one side:

    Sixth: With the extra 1 1/2 in. of fabric hanging off the top and the bottom of the drum, start gluing the inside ring of the drum and pressing down the fabric.

    Seventh: Glue down the fabric on the top, then make sure that the fabric is taught, and glue the bottom down. When it comes to the areas where the metal parts are, simply cut the fabric a little so it can go over the metal easily:
     
     
    Eighth: Once all the fabric on the top and bottom is glued down, fold over 1in. of extra fabric to make a flap to cover the seam {sorry-no photo}. Then trim off all excess fabric on the inside of the drum:


    Ninth: Step back and admire how you just covered a drum shade and made it new again!
    how to cover a lampshade with fabric. I have a few lampshades that could use a makeover....
     
    Thank you Dreambookdesign for this tutorial