If you only have a scrap of fabric you love....
use a different one on the back.

I love the trim
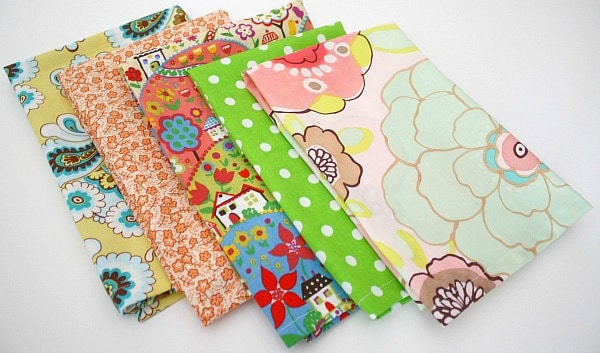
To make all of my DIY Envelope Pillows for spring I used:
-5+ yards of fabric
-11 pillow forms
– rotary cutter and cutting mat (if you don’t have this you can use fabric scissors)
– sewing machine, thread, fabric scissors
– iron and ironing board
I started by measuring my pillow forms and cutting my fabric to fit each form. I mainly used 18×18 square pillow forms (I like the ones from IKEA the best) but I also made a couple of lumbar style pillows in a 12×18 size as well as a 14×25 size. For the purposes of discussing measuring during this tutorial I will refer to the 18×18 size forms.
You are going to need to cut your fabric to the correct width (18″) and length doubled plus 8″-10″ – So: 18″+18″+8″ = 44″-46″ total for the overlap on the back.
How to judge what size to cut your fabric:
I only added about 1/2″ for seam allowance on my 18″ width because I like my pillow covers to fit the pillow forms nice and snugly – no saggy loose pillow covers for me. You need to be the judge of how much seam allowance you need to add because it depends how full and firm your pillow form is. If you have a super full form then maybe add 1″ for seam allowance. If your pillow form looks like horses recently trampled on it, then squish it together to get the accurate size for a nice plump pillow when you measure it.
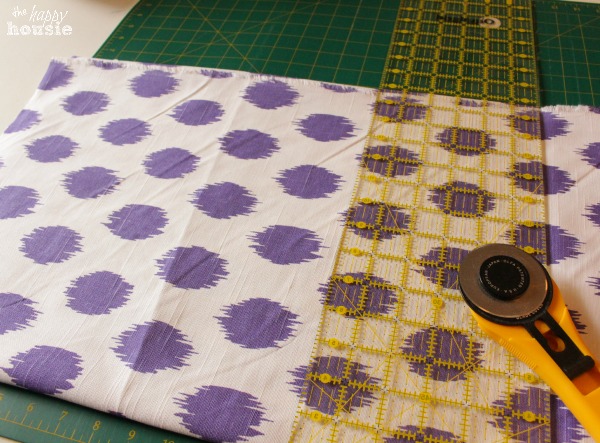
When it is time to cut, measure twice (or 3 or 4 time) and cut once!
I’ve screwed up cutting before. It is truly heart wrenching to waste beautiful fabric. I might not be lying if I told you it has brought me to tears.
Think it out first and be careful. If you don’t have a rotary cutter and mat (probably my favourite crafting tool ever) then you can use a long straight edge and pencil to mark a line and regular ol’ fabric scissors to cut your fabric instead.

Once cut, give ‘er a little iron to smooth out those wrinkles. At the same time you can fold over and iron the hem on the edges that will make the envelope fold on the back (by this I mean hem the short 18″ ends that are at each edge of the looooooong doubled+8-10″ piece). I used the salvage edge of the fabric for one end – it will be folded inside the pillow so you won’t even see it. Then I only had to hem one end. Score.

Now measure your piece of fabric and fold it in onto itself, with the ‘right’ or good side facing in. If, like me, you used the salvaged edge then make sure you fold down the nicely hemmed edge first and have the salvaged edge on the outside of your folded pillow cover (so that when you flip it inside out the salvaged edge will be on the inside of the envelope flap where you won’t see it).
I always like to iron my edges to set them at the correct size before sewing.
Now you just sew together the two edges of your form
Flip it inside out
And stuff it! Literally
Re covering a lampshade
First- Lay out your drum shades seam in line with the end of your fabric:
Second: Start drawing a line on the top and bottom of the drum, leaving 1 1/2 in. between the drum and the line.
Third: Roll your drum across the fabric until you have completed a full circle and your back at the seam. Make sure you have your line {1 1/2 in. away} outlining the drum. This is what your fabric will look like once cut out:

Fourth:Once cut out, wrap around the drum to make sure it fits properly

|
ignore my excess fabric here, it was on purpose because I have a serious habit of cutting fabric too short
|
Fifth: Start by glueing the fabric at the seam on one side:
Sixth: With the extra 1 1/2 in. of fabric hanging off the top and the bottom of the drum, start gluing the inside ring of the drum and pressing down the fabric.

Seventh: Glue down the fabric on the top, then make sure that the fabric is taught, and glue the bottom down. When it comes to the areas where the metal parts are, simply cut the fabric a little so it can go over the metal easily:
Eighth: Once all the fabric on the top and bottom is glued down, fold over 1in. of extra fabric to make a flap to cover the seam {sorry-no photo}. Then trim off all excess fabric on the inside of the drum:

Ninth: Step back and admire how you just covered a drum shade and made it new again!
Thank you Dreambookdesign for this tutorial
|


No comments:
Post a Comment